
Planting Instructions for Evergreens and Shrubs
ESBENSHADE'S GARDEN GUIDE
A Guide to Planting Trees & Shrubs
Give your new trees, evergreens, and shrubs a strong start. Follow these steps to prepare the soil, plant at the right depth, water thoroughly, and care for your landscape as it becomes established.
Jump to: Soil preparation | Container-grown plants | Field-grown plants | Staking | Plant care
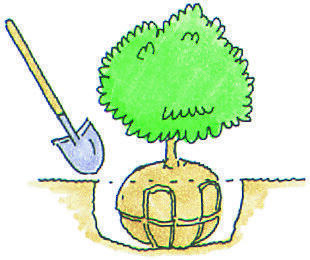
Prepare a wide hole
2 to 3 times the width of the root ball.
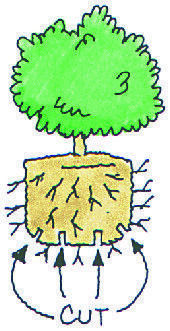
Loosen bound roots
Gently spread roots before planting.
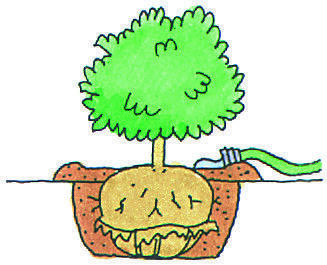
Water deeply
Slowly soak to the depth of the root ball.
1. Prepare the planting hole & soil
Dig a hole 2 to 3 times as wide as the root ball and only as deep as the root ball. Prepare your backfill by mixing 1 part Bumper Crop Organic Soil Builder with 2 parts native soil from the hole.
Next, follow the directions for the type of plant you purchased.
2A. Plant container-grown trees & shrubs
- Remove the container. Carefully slide the plant out of its pot.
- Loosen the roots. Gently loosen roots around the sides and bottom of the root ball. If tightly bound roots cannot be loosened with your fingers, make three or four cuts about 1 inch deep with a knife or pruning shears, then gently pull the roots apart.
- Set the plant. Center it in the hole with the top of the root ball 1 to 3 inches above ground level. Keep loosened roots spread out.
- Backfill. Fill around the roots with your prepared soil mix and firm it in place. Form a shallow saucer of soil around the plant to help hold water.
- Water thoroughly. Give the root ball a slow, deep soaking. Apply Esbenshade's Transplant Root Stimulator according to the product label.
- Mulch. Apply a 2-inch layer of mulch, leaving an open space of 3 inches around the trunk or base of the plant for air circulation.
2B. Plant field-grown trees & shrubs
Use these directions for plants sold with a burlap-wrapped root ball.
- Position the root ball carefully. Center the plant in the hole with the top of the root ball 1 to 3 inches above ground level, and straighten the plant.
- Remove cords and twine. Cut and remove all cords or twine from the root ball and trunk. Loosen natural burlap, pull it away from the trunk, and tuck it below the soil surface. Remove synthetic or plastic wrapping entirely.
- Backfill. Fill with your prepared soil mix and firm it in place. Form a shallow saucer of soil around the plant.
- Water thoroughly. Slowly soak the root ball and apply Esbenshade's Transplant Root Stimulator according to the product label.
- Mulch. Spread a 2-inch layer of mulch. Keep it at least 3 inches away from the trunk.
3. Stake when support is needed
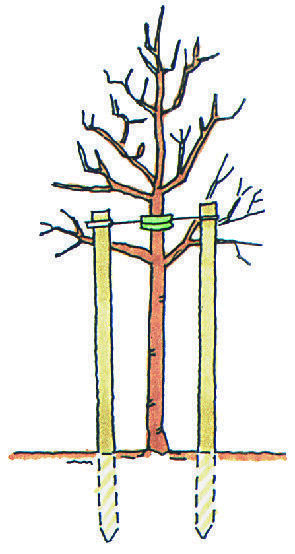
Place anchor stakes in firm ground outside the planting hole.
Larger trees and plants that tend to lean may need support. Use three support wires secured to anchor stakes in firm ground outside the planting hole, never through the root ball. Cover any wire that touches the tree with protective hose to help prevent bark damage.
Care after planting
Water deeply & check the soil
During the first year or two, slowly soak the soil to the depth of the root ball. As a general guide, aim for about 1 inch of water per week, including rainfall. Let a hose trickle slowly at the base until water reaches the root depth.
Feel the soil before watering. If it is still wet, do not add more water. A thorough soaking is more effective than frequent, light watering. Adjust watering to rainfall, soil conditions, and your plant's needs.
Focus on roots first
Use Esbenshade's Transplant Root Stimulator right after planting, following label directions. Avoid fertilizers intended for mature plants on newly planted material; they can damage the plant. After the first growing season, begin an appropriate regular fertilizer program.
Watch for insects & disease
Check for holes, browning leaves, or browning needles. These can be signs of an insect, disease, or fungal problem. Ask our staff for help identifying the cause and choosing a treatment.
Give special-care plants the right conditions
Azaleas, hollies, rhododendrons, and dogwoods need attention to drainage, soil acidity, and organic matter. Check the light requirements for your specific plant. Use a soil test to check acidity before making adjustments. Where appropriate, work organic pine soil conditioner or peat moss into the existing soil at planting.
Recommended planting supplies

Bumper Crop Organic Soil Builder
Mix with native soil when preparing your planting backfill.
View product
Esbenshade's Transplant Root Stimulator
Use at planting to support root development. Follow product label directions.
View productCheck your soil: Browse soil testing supplies to help choose appropriate amendments.
Need help with your new planting? Our garden center team can help you choose soil amendments and plan care for your specific trees and shrubs.